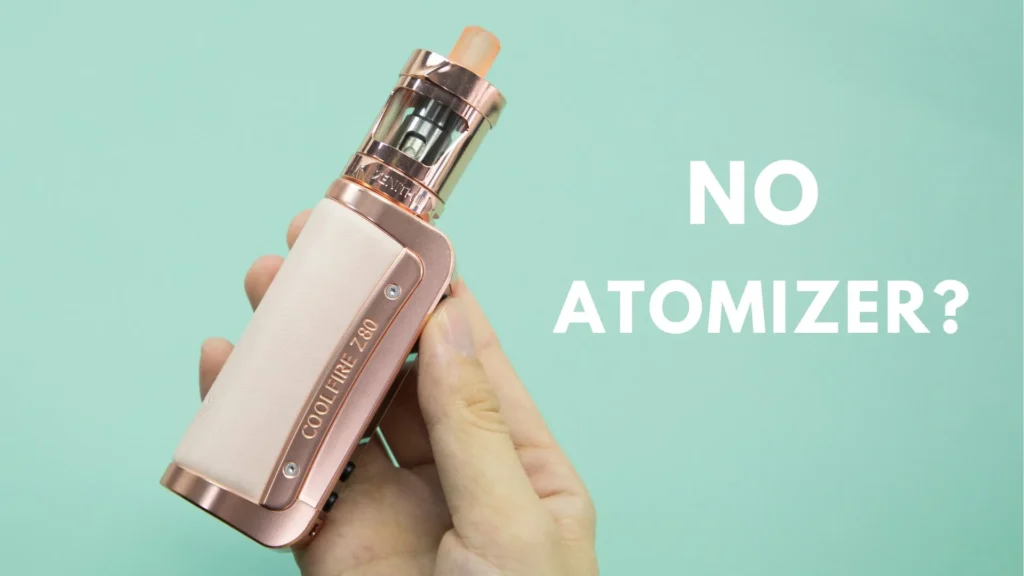
Understanding the No Atomizer Error Message on Your Vaping Device
When you press the fire button on your vape device and see the frustrating “no atomizer” or “check atomizer” message on your screen, it can be confusing and annoying. This common vaping problem affects thousands of users worldwide, but understanding the no atomizer meaning is the first step toward solving it quickly and effectively.
The “no atomizer” error message appears when your vape mod cannot detect the coil within your vape tank properly. This issue typically occurs when there’s a connection problem between your device and the atomizer, which is the essential component that heats your e-liquid to create vapor.
The no atomizer meaning essentially tells you that your device thinks there’s no tank or coil attached, even when everything appears to be properly connected. This error can happen suddenly and without warning, often leaving vapers puzzled about what went wrong with their device.
What Exactly Is an Atomizer and Why Does It Matter?
Before diving into solutions, it’s important to understand what an atomizer actually is. The atomizer typically refers to the wick and coil component of the vape that heats e-liquid inside the tank to produce vapor. This crucial component consists of a metal coil wrapped around a wick material that absorbs your e-liquid.
When you activate your vape device, the atomizer heats up and transforms the e-liquid into the vapor you inhale. Without a properly functioning atomizer, your device simply cannot work. This is why the no atomizer meaning is so significant – your device is telling you it cannot detect this essential component.
The atomizer connects to your device through what’s called a 510 connection, which is the standard threading system used in most vape devices. When this connection fails or becomes disrupted, you’ll see the dreaded no atomizer error message.
Common Causes Behind the No Atomizer Error Message
Understanding the no atomizer meaning requires knowing what causes this error in the first place. One of the most common causes of this error is insufficient coil contact with the tank base, which can lead to a poor connection between the vape tank and coil.
The most frequent culprit is a dirty or damaged connection point. If your vape can’t detect the coil in any connected tank or pod, the most likely culprit is dirt, dust or e-liquid residue on the metal contact point at the top of the device. When these contact points become blocked or contaminated, they cannot establish the electrical connection needed for your device to recognize the atomizer.
Another common cause is a loose connection between components. Sometimes, the tank isn’t properly screwed onto the device, or the coil isn’t fully seated in the tank base. Even a slightly loose connection can trigger the no atomizer error message.
Faulty or damaged coils can also cause this problem. If your coil has internal damage or manufacturing defects, your device may not be able to read its resistance properly, leading to the error message. Additionally, if you’re using a coil that’s not compatible with your device, you might encounter this issue.
Step-by-Step Solutions to Fix Your No Atomizer Error
Now that you understand the no atomizer meaning and its causes, let’s explore effective solutions to get your device working again. The good news is that most no atomizer errors can be resolved with simple troubleshooting steps.
The first thing you should do when dealing with a “no atomizer” error is disconnect and reconnect your tank or pod. This simple step often resolves the issue immediately by reestablishing the connection between components.
Start by carefully unscrewing your tank from the device. Examine both the threading on the tank and the connection point on your device. Look for any visible dirt, dust, or e-liquid residue that might be interfering with the connection. Clean both surfaces gently with a dry cloth or cotton swab.
Next, check your coil installation. Remove the coil from your tank and inspect it for damage. Look for any signs of corrosion, bent pins, or physical damage. If the coil appears damaged, replace it with a new one. When reinstalling the coil, make sure it’s properly seated and tightened, but don’t over-tighten as this can cause damage.
If cleaning and reconnecting don’t solve the problem, try using a different coil. Sometimes, a faulty coil is the culprit, and replacing it will immediately resolve the no atomizer error. Always ensure you’re using coils that are compatible with your specific device model.
Advanced Troubleshooting Techniques for Persistent Issues
If basic troubleshooting doesn’t resolve your no atomizer error, there are additional steps you can take. Sometimes, the issue lies deeper within the device’s connection system or requires more thorough cleaning.
Inspect the 510 connection pin on your device. This small metal pin should be clean and slightly raised. If it’s pushed down too far or appears damaged, it may not make proper contact with your tank. Gently lift the pin using a small screwdriver or similar tool, being very careful not to damage it.
Check for any e-liquid that may have leaked into the device. E-liquid residue can cause connection problems and trigger the no atomizer error. If you find any liquid inside the device, clean it thoroughly with a cotton swab and allow it to dry completely before reassembling.
Sometimes, the issue is with the tank’s base connection. Remove the tank’s base and inspect the threading and connection points. Clean everything thoroughly and ensure all components are properly aligned when reassembling.
When to Seek Professional Help or Consider Replacement
While most no atomizer errors can be resolved through troubleshooting, some situations may require professional assistance or device replacement. If you’ve tried all the solutions mentioned above and the error persists, the problem might be more serious.
Persistent no atomizer errors after thorough troubleshooting could indicate internal device damage or manufacturing defects. In such cases, if your device is still under warranty, contact the manufacturer for support or replacement options.
At Vape Buying Tips, we understand how frustrating these technical issues can be. Our team of vaping experts is here to help you navigate any challenges you face with your vaping devices. Whether you need troubleshooting assistance or advice on choosing the right replacement components, we’re committed to ensuring you have the best possible vaping experience.
Preventing Future No Atomizer Errors
Understanding the no atomizer meaning is just the beginning. Prevention is always better than cure, so here are some tips to help you avoid future no atomizer errors and keep your device functioning smoothly.
Regular maintenance is key to preventing connection issues. Clean your device’s connection points regularly, especially if you’re a heavy vaper or use sweet e-liquids that can leave residue. Make it a habit to inspect and clean your device weekly.
Always handle your coils with care during installation and removal. Avoid over-tightening, which can damage the threads or connection points. Similarly, ensure coils are properly tightened to prevent loose connections that trigger the no atomizer error.
Store your device properly when not in use. Avoid extreme temperatures and humidity, which can cause condensation and corrosion issues. Keep your device in a clean, dry environment to prevent dust and debris from accumulating in the connection points.
Use high-quality, compatible components. Cheap or incompatible coils and tanks can cause various issues, including the no atomizer error. Invest in quality components that are specifically designed for your device model.
Frequently Asked Questions About No Atomizer Errors
Q: What does “no atomizer” mean on my vape device? A: The no atomizer meaning indicates that your device cannot detect the coil or atomizer component, usually due to connection issues or faulty components.
Q: Can I still use my vape if it shows “no atomizer”? A: No, you cannot vape when this error appears. The device won’t fire because it cannot detect the atomizer needed to heat the e-liquid.
Q: How often should I clean my device to prevent no atomizer errors? A: Clean your device’s connection points weekly, or more frequently if you’re a heavy user or notice any residue buildup.
Q: Will using different coil brands cause no atomizer errors? A: Using incompatible coils can cause this error. Always use coils specifically designed for your device model.
Q: Is the no atomizer error dangerous? A: The error itself isn’t dangerous – it’s a safety feature that prevents the device from firing when it can’t properly detect the atomizer.
Take Action Today: Get Expert Vaping Support
Don’t let the no atomizer error ruin your vaping experience. At Vape Buying Tips, we’re committed to helping vapers worldwide overcome technical challenges and enjoy their devices to the fullest. Our comprehensive guides and expert advice are designed to make vaping simple and enjoyable for everyone.
If you’re still experiencing issues after trying these solutions, or if you need personalized advice for your specific device, don’t hesitate to reach out to our team. We provide expert support to customers across the United States, United Kingdom, Canada, and Australia, ensuring you get the help you need regardless of your location.
Contact Vape Buying Tips today for professional assistance with your vaping needs. Our experienced team is ready to help you resolve any technical issues and provide recommendations for the best vaping products and accessories. Visit our website or reach out to our customer support team to get started on your journey to better vaping experiences.
Remember, understanding the no atomizer meaning and knowing how to fix it is just one part of successful vaping. With the right knowledge, quality components, and proper maintenance, you can enjoy consistent, satisfying vaping sessions without the frustration of technical errors.


